패스스루 100 Series/C230 Series Chipset Family USB 3.0 xHCI Controller
노리가 사용하고 있는 NAS 케이스의 USB 컨트롤러를 ESXi에서 패스스루하기 위한 방법이다.
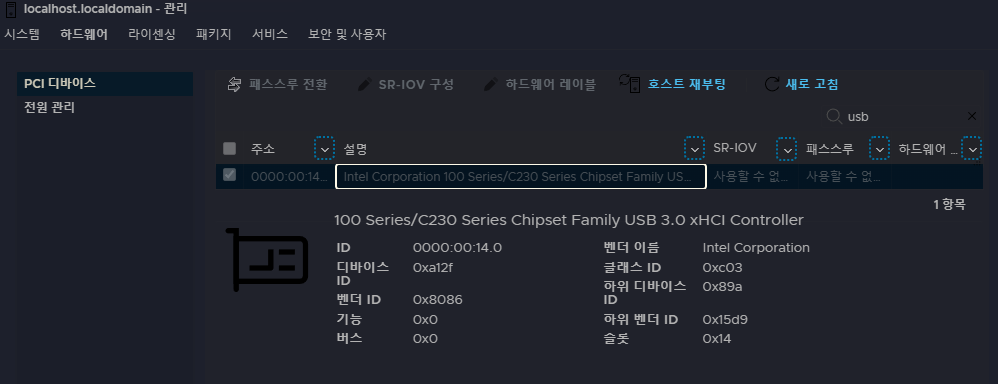
먼저 ESXi 관리 > 하드웨어에서 usb를 검색하여, 컨트롤러 이름을 알아낸다.
https://www.myvirtualschool.ca/2021/03/how-to-force-passthrough-internal-usb.html
위 링크의 내용은 아래 블록에 기재하였다.
본문 내용
How to FORCE passthrough the internal USB controller in the mother board
- Enable ssh on esxi.
- From terminal of your computer, ssh to esxi:
0000:00:00.0 Bridge Host bridge: Intel Corporation Xeon E3-1200 v6/7th Gen Core Processor Host Bridge/DRAM Registers
Class 0600: 8086:591f
0000:00:01.0 Bridge PCI bridge: Intel Corporation Xeon E3-1200 v5/E3-1500 v5/6th Gen Core Processor PCIe Controller (x16) [PCIe RP[0000:00:01.0]]
Class 0604: 8086:1901
0000:00:02.0 Display controller Display controller: Intel Corporation HD Graphics 630
Class 0380: 8086:5912
0000:00:14.0 Serial bus controller USB controller: Intel Corporation 100 Series/C230 Series Chipset Family USB 3.0 xHCI Controller
0000:00:14.2 Signal processing controller Signal processing controller: Intel Corporation 100 Series/C230 Series Chipset Family Thermal Subsystem
Class 1180: 8086:a131
0000:00:16.0 Communication controller Communication controller: Intel Corporation 100 Series/C230 Series Chipset Family MEI Controller #1
Class 0780: 8086:a13a
0000:00:16.3 Communication controller Serial controller: Intel Corporation 100 Series/C230 Series Chipset Family KT Redirection
Class 0700: 8086:a13d
- You will find the useful info:
Class 0c03: 8086:a12f
- Edit the file /etc/vmware/passthru.map
# passthrough attributes for devices
#
# file format: vendor-id device-id resetMethod fptShareable
# vendor/device id: xxxx (in hex) (ffff can be used for wildchar match)
# reset methods: flr, d3d0, link, bridge, default
# fptShareable: true/default, false
#
# Description:
#
# - fptShareable: when set to true means the PCI device can be shared.
# Sharing refers to using multiple functions of a multi‐function
# device in different contexts. That is, sharing between two
# virtual machines or between a virtual machine and VMkernel.
#
# - resetMethod: override for the type of reset to apply to a PCI device.
# Bus reset and link reset prevent functions in a multi-function
# device from being assigned to different virtual machines, or from
# being assigned between the VMkernel and virtual machines. In
# some devices it's possible to use PCI power management capability
# D3->D0 transitions to reset the device. In the absence of the
# override, the VMkernel decides the type of PCI reset to apply
# based on the device's capabilities. The VMkernel prioritizes
# function level reset (flr).
#
# Restrictions:
#
# - PCI SR-IOV physical and virtual functions (PFs/VFs) are not allowed
# in the list below. Those must support function-level-reset and
# must be shareable.
#
# Intel 82579LM Gig NIC can be reset with d3d0
8086 1502 d3d0 default
# Intel 82598 10Gig cards can be reset with d3d0
8086 10b6 d3d0 default
8086 10c6 d3d0 default
8086 10c7 d3d0 default
8086 10c8 d3d0 default
8086 10dd d3d0 default
# Broadcom 57710/57711/57712 10Gig cards are not shareable
14e4 164e default false
14e4 164f default false
14e4 1650 default false
14e4 1662 link false
# Qlogic 8Gb FC card can not be shared
1077 2532 default false
# LSILogic 1068 based SAS controllers
1000 0056 d3d0 default
1000 0058 d3d0 default
# NVIDIA
10de ffff bridge false
# below is by David
# usb internal
8086 a12f d3d0 default
- Add the "8086 a12f" follow by the default volume" d3d0 default", then save and exit.
- After reboot, you will find the internal USB controller can be passthrough now.
위 링크의 내용에 따르면
/etc/vmware/passthru.map 파일을 수정해서 다음 스크립트를 추가해야 한다고 한다.
# usb internal
8086 a12f d3d0 default따라서, SSH에 접속하고, 다음 명령어로 컨트롤러 이름이 일치하는지 확인한다.
lspci -v확인이 끝났다면, 다음 명령어로 vi 편집기를 실행한다.
vi /etc/vmware/passthru.map키보드 A키를 누르고, 최하단으로 내려가 다음 스크립트를 추가한다.
# usb internal
8086 a12f d3d0 default추가하였다면 ESC키를 누르고 :wq!를 입력하여 저장하고 빠져나온다.
ESXi를 재부팅하고, 패스스루가 되는지 확인한다.

이후 ESXi VM 편집에 들어가, PCI 디바이스를 추가하고 USB 컨트롤러를 추가한다.
아래의 내용은 확실치 않지만, PCI 디바이스를 추가한 뒤로 헤놀로지의 전원을 켰더니,
메모리 예약 설정이 이상하다며 전원이 켜지지 않았다.

따라서 메모리 예약도 설정해주고 (동일한 용량을 설정해주면 된다.)
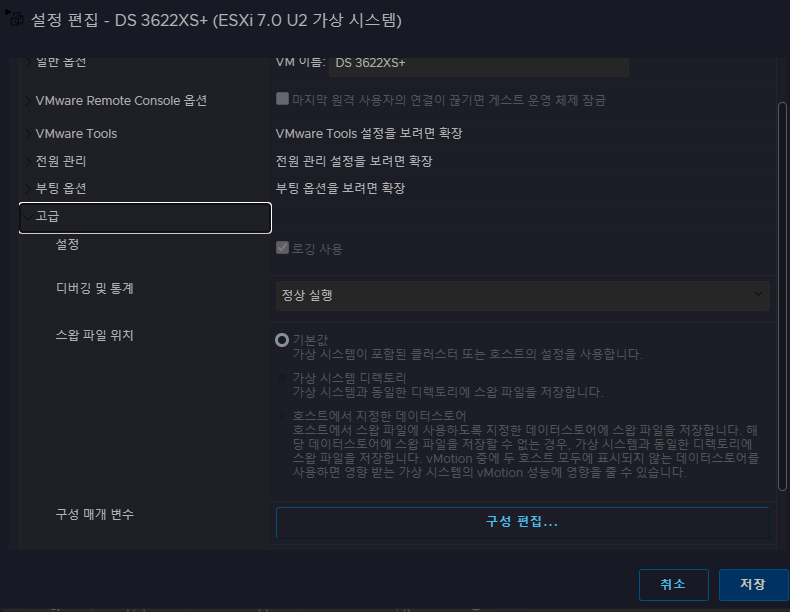
왜 추가하는지는 모르겠지만, VM 옵션 > 고급 > 구성 편집에서 아래 내용을 추가한다.
usb.generic.allowHID = TRUE
usb.generic.allowLastHID = TRUE
테스트 결과, 외장 HDD와 UPS를 모두 인식한다.